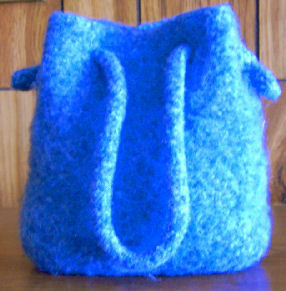
Be sure to read the fine print at the bottom for copyright compliance.

Materials:
2 balls Paton’s Classic Wool Any 100% wool yarn will do. Do not use a superwash wool as it will not felt. Colors matter. Light colors, white, aran, natural do not felt as well as darker colors.
16” circular needle size 10 ½
2 double pointed needles size 10 ½
Purse:
With two strands of yarn held together, cast on 34 stitches. Knit back and forth in garter stitch for 34 rows. Break and finish off one strand of yarn. Now with remaining strand of yarn continue by picking up 16 stitches down short side of piece. Place one of the 3 same color markers on needle. Pick up and knit 34 stitches along long side of piece. Place another of the same color markers on needle. Pick up and knit 16 stitches along remaining short side of piece and place last of the same color markers on needle. Knit across remaining 34 stitches. Place remaining marker. This marker marks not only the corner but the row. From now on you will be knitting in the round. Knit 56 rows.
Next round: *Knit 3, bind off 3, knit 4 (includes stitch on needle after bind off), bind off 3, knit 3 ( includes stitch on needle after bind off) Slip marker.*
**Knit 7, bind off 3, knit to last 10 stitches before marker, bind off 3, knit 7 (includes stitch on needle after bind off). Slip marker.**
Repeat * to * for next short side.
Repeat from ** to ** for remaining long side.
Next round: Knit around casting on 3 stitches over every 3 stitch bind off of previous row. Leave the row marker on your needle, but remove the other markers as you go.
Knit for 8 more rows. Bind off. Weave in ends on wrong side of work.
Handles:
Make 2. Handles are made in 5 stitch I cord. Cast 5 stitches on one of the double pointed needle. Do not turn. Push stitches down to working end of needle. Pull yarn across back of work and knit. Continue in this way, pushing the stitches down to a working position at the end of the needle and pulling the yarn across the back of work. Never turn work but always have the right side facing you. Make each I cord 36” long. Bind off.
Felting:
Put your finished pieces in a pillow slip or net bag. Note: This is highly recommended as it will keep your I cord from tying itself in knots as well as keep lint from clogging your filter. Set washing machine for the smallest load, hot water wash and cold water rinse. Add a bit of detergent. Put the bag in the machine and run through a complete cycle. Some recommend putting towels, jeans or some other heavy items in with piece to be felted. The friction of items rubbing together during the process is suppose to facilitate felting. I have never found this necessary. At the end of the cycle check the purse. If properly felted the fabric should be thick and firm. You should not be able to see the individual knit stitches on the sides of bag. (The ridges of the garter stitch bottom will still be visible.) If purse does not meet those standards return to machine and run through another cycle. This time, however, check the progress every five minutes. When the purse meets your criteria, advance the machine timer to rinse and complete the wash cycle. Remove purse. Begin to shape with your hands. Pull and stretch the wool until you are satisfied with the proportions. (Note: It is not possible to give definitive measurements as felting is not a precise process.) Hold the ends of the I cord and pull, stretching them to be sure they are the same length. Place pieces on a towel away from direct sunlight. Allow pieces to dry thoroughly.
Finishing:
Thread I cord through eyelets. Tie ends on each side in overhand knot. If necessary, adjust knots to insure handles are even. If you have used a yarn that got very fuzzy during the felting process you can trim the fuzzy ends if you wish.
No comments:
Post a Comment